
![]()
| Home | Source Reduction | Friends of Green Friends | Newsletters |
| Gardening | Resources | What You Can Do | Embracing The Trees |
| Clay Pot Irrigation |
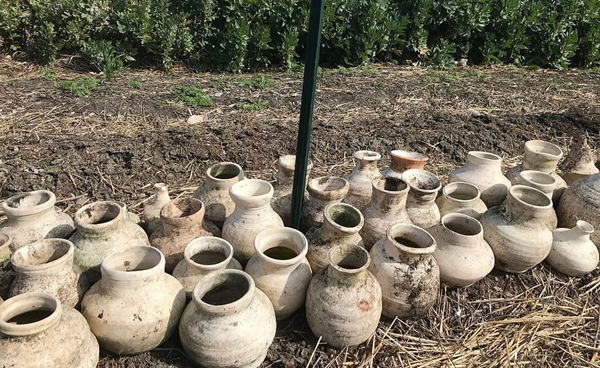 Custom-made olla pots ready for burying |
| As we look at another drought-filled season here in the San Francisco Bay Area, it is a continuing imperative to try to conserve as much water, while increasing the efficiency and yield of our home gardens. This is true throughout the world. Fortunately, we can turn to an age old method that is guaranteed to give you this level of conservation while improving yields in your garden.
Buried clay pot irrigation or "ollas", which is Spanish for pots, is a clever invention that has proven to increase productivity and significantly decrease water consumption for over 4,000 years around the globe, including India, Africa, China and the Americas. Recent comparative studies conducted in Zambia by the University of Pretoria demonstrated significant improvement in crop size and quality, while greatly reducing water consumption by 70%. In some cases using ollas was just as effective as surface irrigation. Here in the US, master gardeners in Arizona and New Mexico boast almost 90% water conservation with olla irrigation. At our vegetable farm at MA Center San Ramon, we decided to experiment with ollas during the 2019 growing season, and our findings were equally astonishing. |
| Method
We applied the ollas method to two of our garden rows, namely tomatoes and peppers, while the rest of the field was irrigated with mulched drip irrigation. We irrigated twice a week. On several occasions prior to irrigating, we inserted a dry stick into a few ollas to assess water level. Additionally, although we mulched heavily with straw in order to reduce weed growth, studies show that irrigating deep underground at the root level greatly reduces weed proliferation, leaving you to spend less time weeding and more time enjoying the garden. Results When we checked five days after their last filling, most often, the ollas still had over 50% of their water— in the heat of the California summer! The two beds with ollas produced just under 400 lbs. of tomatoes and peppers that were sweet and juicy, whereas the beds without ollas consistently struggled to deliver. The best yield for a bed using drip irrigation was the potato bed, producing only 115 lbs.. When we completed our data collection on water consumption, the rows with ollas used 88% less water than drip irrigation! |
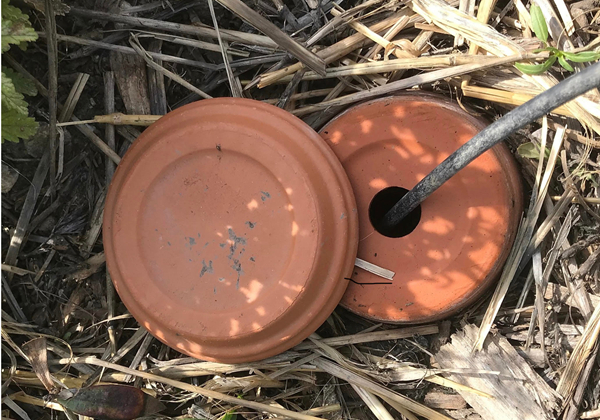 Olla in the ground with saucer lid and drip line feeding it |
|
Do-It-Yourself Do-it-yourself ollas are easy to make, using a couple of unglazed terracotta flower pots, some water-based silicone caulk and a little duct tape. Here are the steps:
Allow the pot to dry for 24 hours and you have your first olla ready to go in the garden! Make sure you bury the pot leaving no more than an inch exposed, and cover the hole with a clay pot saucer or a stone. Due to the fact that our vegetable farm here at the San Ramon ashram is fairly large, we have drip lines set up to fill the pots; however, the pots can be easily filled by hand in smaller gardens. We are planning on hosting some gardening workshops in 2020 at MA Center San Ramon once the current social restrictions are lifted, to provide guidance on how to implement this time-tested method into a home garden. |
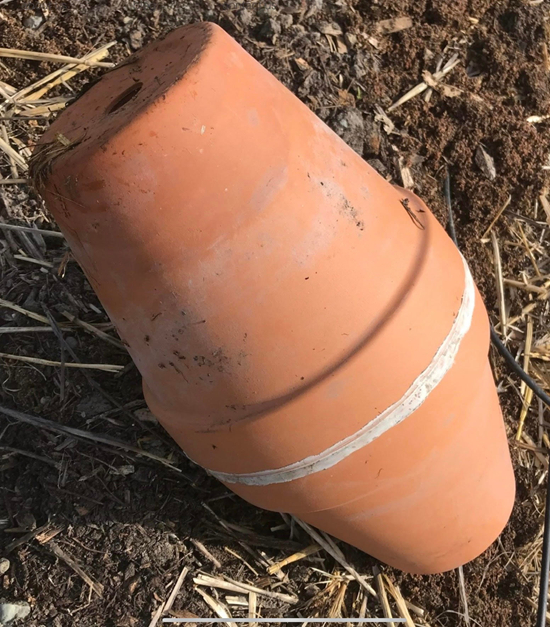 A sample do-it-yourself Olla |
| Home | Source Reduction | Friends of Green Friends | Newsletters | Resources | What You Can Do | Embracing The Trees |
For more information, e-mail info@greenfriendsna.org |
||||||