| Home | Source Reduction | Friends of Green Friends | Newsletters |
| Gardening | Resources | What You Can Do | Embracing The Trees |
| Indoor Gardening Guide |
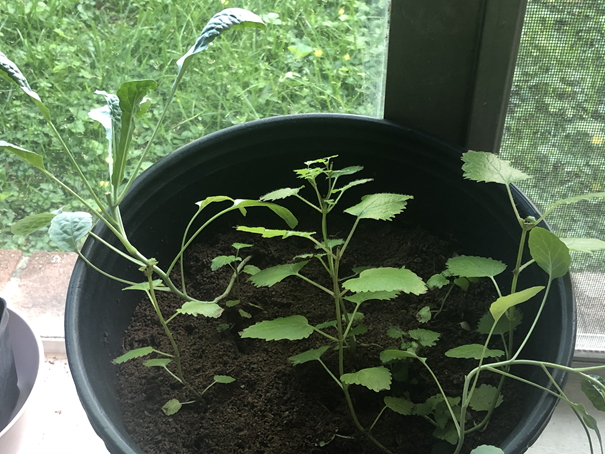
 Lemonbalm started in a pot |
|
Amma has recommended we try to grow our own fruits and vegetables. For those who have a backyard or a patio to garden, you already have a grow space - that’s so great! If your outside space does not get any sun, or you want or need to grow indoors for any reason (like me, without a patio/garden space), you can, too! It may take a small investment up front, but you can have fresh vegetables without going to the store - and also following our Amma’s wishes, as things get complicated due to coronavirus.
I do not know about others, but as somebody who has not grown much on my own before, I was hesitant to start, especially with an indoor garden. But with some effort and Grace, it does not seem as hard anymore. If I can do it in my small apartment with not much light, I believe you can also make it happen. I am also learning as I go. Right now, I have one set of herbs (lemon balm) and kale started, and I am starting a few more vegetables in the next two weeks. The below guides are a result of my research and advice from experienced gardeners. I recommend maybe starting out with 1-3 herbs or vegetables you want to use; start slow, learn, and build up. Lettuce seems to be a simple vegetable to start with. Please remember to try and buy, use, and conserve heirloom seeds. Organic, if possible. Amma recommended this in Summer 2019 in a retreat at Santa Fe, at the end of the Q&A session. All love and happy learning and growing adventures! |
|
Step 1: Pick Your Target Plants and Procure Seeds Many plants can be grown indoors with the right temperature, humidity and light conditions. While altering temperature can be trickier, you can modify light and humidity using grow lights or an inexpensive humidifier. If you are growing produce indoors to eat on a regular basis, maybe it would be best to pick seeds that are higher yield, easy to raise, and meet your indoor temperature conditions. Lettuce is a good plant to have around because it can be continuously harvested and does not require a lot of sun or soil. Although it is it is a cooler weather plant (preferring 60 - 70°F conditions), there are some varieties of loose leaf lettuce, such as Bibb, that can grow in temperatures up to 80°F. Research the needs of your plants as you decide what to plant, and see if they suit your home. For instance, if you want to plant beans, know that you need to buy a trellis to help support the creeper as it grows. You can also start some herbs in small pots. We have lemon balm, rosemary and thyme growing. If you want to follow our simple indoor vegetable garden, we picked lettuce, kale, Parisian carrots (which are short spherical carrots) and bell peppers for this first foray. I would stay away from microgreens for now, because you’d have to keep buying seeds to eat - and those seeds seem to be in short supply online. When you grow your own full-sized plant, however, you can help it bolt or go to seed and produce more seeds for the next grow cycle. In terms of how to buy seeds to plant, you can buy heirloom seeds online. There are a few sites, one of which is a non-profit named Seed Savers that sell them. Some of these heirloom seeds are even USDA organic. Alternatively, you can ask your nearby garden/home improvement store or wellness supermarkets if they carry seeds. |
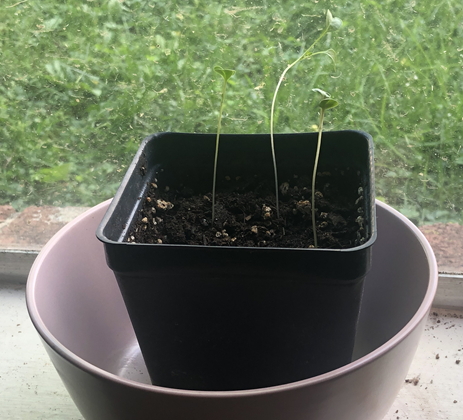
 Kale sprouts |
|
Step 2: Decide on your Planters Each vegetable or fruit you grow will have an ideal soil depth to accommodate its roots once grown. Research the needed depth and buy or fashion a planter that meets that depth. Do not use a deeper-than-necessary planter, as it will just take up more soil, which can be expensive. In terms of the types of planters one can buy, there are:
Consider what your space can accommodate. For our home, I have chosen grow bags split into 4 sections and some large plastic pots. Make sure there are holes for drainage in your planters (you can always make some holes by drilling them in). You can also fashion planters out of items you may have around the house. Depending on the soil depth needed, you can look for milk crates, old trays of the right depth, Tupperware, grocery bags, drawer organizers, cardboard boxes even. If you go with cardboard, to prevent it from becoming soggy when watering, you can double layer boxes or add a burlap sack inside, add holes for drainage, and maybe some rocks in the bottom. Another idea is to use the bag of soil you get as a planter - just punch holes in the bag and plant your seeds. This method seems a little trickier, so I would not recommend - but you can do your own research and decide! Once you have decided on your plants and planter, you can move to the next step! Do "start small" with just a few vegetables, if this is your first time growing. You can even start with just lettuce, as suggested. |
|
Step 3: Procure Soil, Fertilizer and Grow Lights For indoor gardening, buy a good, ideally organic indoor/container garden potting mix. Be careful not to buy potting soil, or soil meant for outdoor gardens. Be sure to look around online or in home improvement stores for the kind you prefer; read some recent reviews and also find something that meets your budget. Also, at the same time, look for an all-purpose organic fertilizer for indoor vegetables (a 1:1:1 N:P:K ratio seems appropriate) and consider looking for some high quality compost for compost tea. You can call facilities that offer composting services near you to ask how to buy their finished compost. Alternatively, you can buy compost from a home improvement store or online retailer. Compost and fertilizer are not the same thing; compost is used to replenish the soil, while fertilizer is used to feed the plants. If you want to pick just one for now, pick fertilizer - you can add compost later to revitalize your soil (see step 6). If you do go with just fertilizer, try to find one with beneficial micro-organisms in it. Do fertilizer near the root zone of a plant, so the benefits can soak down into the roots. If you are growing your plants indoors in a shadier area, you may want to consider a grow light, or grow lights. Plants need the right kind of light and right amount; grow lights can supplement the indoor light we have. Without enough light, your plants may grow weakly and become "leggy". Grow bulbs or grow lights have the right frequencies of light for a plant. You don’t have to invest in the purple/red grow lights - you can find grow lights that emit regular-looking light but have the frequencies your plants need. We purchased a LED grow light bulb that can fit into a lamp we have; we are using this as a grow light, as it seems ecofriendly (bulbs can be replaced/recycled). It was also budget-friendly. To get specific, grow lights with mostly red spectrum are good for plants you want to flower or fruit (tomatoes, peppers, strawberries). If you were to start with just the one light, you can buy a balanced spectrum light that work for both leafy greens and fruiting plants. An alternative to buying specifically tagged grow lights is to use a combination of “cool white” and "daylight" LED lights. You may also consider purchasing a soil pH/light/moisture meter so you can assess the growing conditions to remedy any issues. You may also consider buying a grow light timer so you can ensure that your plants receive the right amount of light and darkness for growth (each plant has different likes and dislikes). Or you could wing it without these tools and see if you need them later. |
|
Step 4: Grow the Plants! There is some debate about how to plant seeds. Some suggest germination in "seed starting mix" and then transplanting the germinated plants to a bigger pot. This seems to yield better results for some. However, I wanted a simpler alternative, so I just went with direct sow for my herbs and for my kale plants. Direct sow seems to be working for them. In any case, sow the seeds in your planters according to instructions and water accordingly. Lights should be as close to the soil as possible for starting seeds. Wait, and soon your seeds will sprout! Fertilize about once every two weeks and check the soil conditions from time to time, to ensure it meets your plants’ needs. Water as instructed by the seed’s growing guide. Incrementally raise up the grow lights as the plants grow to keep them directly over the leaves. There is one method of planting you may want to investigate: succession planting. Radishes, for instance, are a "one and done" vegetable. When you harvest the radishes, almost nothing is left behind for future growth. In order to ensure a consistent harvest of radishes, consider planting your seeds at week-long increments, so you can enjoy radishes consistently. Carrots and potatoes also fall into the same category as radishes. Lettuce, on the other hand, you can harvest consistently, if you harvest the right way, however; you can still plant a lettuce seeds a few weeks apart in order to ensure a consistent harvest. |
|
Step 5: Harvest! Look online and ensure you harvest your vegetables the right way for your needs. For lettuce, you can trim the outer leaves and allow leaves to grow back, for a continuously growing plant. Or, if you have succession planted, you could harvest the whole lettuce head. Treat this first foray as a learning experience; if there are any issues, diagnose and try again! Step 6: Soil Replenishment, Rest and Rotation Soil feeds our plants and can get depleted with time. Different kinds of plants take up and add in different nutrients to the soil. To help soil rest and replenish, after we have harvested a plant completely, we should remove any excess plant matter (such as roots), turn the soil (bring the bottom soil to the top, essentially, mixing it all up), and blend in compost or plant food. Finally, consider crop rotation. Crop rotation is a method that has been used for centuries, wherein you rotate crop from different families (legume, root, leaf, and fruit) so that the soil does not get too depleted of any one kind of nutrient. Consider changing what is in each pot from year to year, following a crop rotation schedule. |
| Home | Source Reduction | Friends of Green Friends | Newsletters | Resources | What You Can Do | Contact Us |
For more information, e-mail info@greenfriendsna.org |
||||||